Ghép dữ liệu cho chủ đề và thẻ trong theme blog EzyPlatform đơn giản
Back To Blogs
Post by:
 Young Monkeys - Founder
Young Monkeys - Founder
Date:
1760198710000
Mục tiêu
Trong bài trước, chúng ta đã tìm hiểu về lập trình menu cho EzyPlatform Admin Plugin. Ở bài này, chúng ta sẽ quay trở lại với theme blog để ghép dữ liệu cho các chủ đề (topic/category) và thẻ (tag) — giúp các phần này hiển thị dữ liệu động thay vì dữ liệu tĩnh.
1. Chuẩn bị dữ liệu trong phần Admin
Trước tiên, để hiển thị dữ liệu động, bạn cần tạo danh mục và thẻ trong phần quản trị.
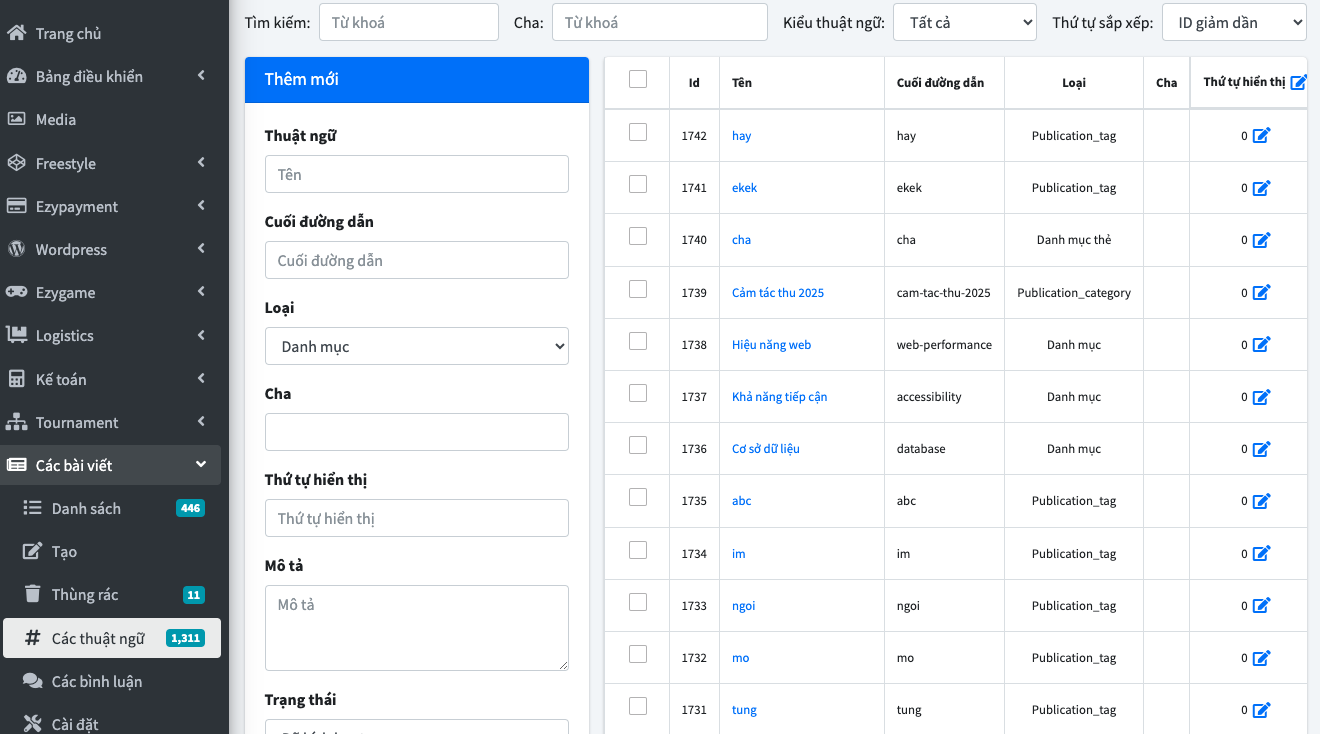
Bước 1: Truy cập vào Admin → Bài viết → Các thuật ngữ
Tại đây bạn có thể:
- Chọn kiểu thuật ngữ là “Danh mục” để tạo các chủ đề (category).
- Hoặc chọn “Thẻ” (Tag) để tạo các thẻ gắn cho bài viết.
Bước 2: Thêm mới danh mục và thẻ
Bạn có thể tạo nhiều chủ đề hoặc thẻ tuỳ ý. Ngoài ra, mỗi danh mục có thể thiết lập thêm:
- Ảnh tiêu đề (Cover image) để hiển thị kèm tên danh mục.
- Thứ tự hiển thị (Display Order) giúp sắp xếp danh mục trên giao diện.
Ví dụ:
Sau khi hoàn tất, phần quản trị đã sẵn sàng dữ liệu để ghép vào theme.
2. Thay đổi mã nguồn HomeController
Chúng ta sẽ cần thay đổi để bổ sung các service cũng như các biến cần thiết:
@Setter
@Controller
public class HomeController {

    @EzyAutoBind
    private WebPageFragmentManager pageFragmentManager;

    @EzyAutoBind
    private WebLanguageControllerService languageControllerService;

    @EzyAutoBind
    private WebSettingService settingService;

    @EzyAutoBind
    private WebPostControllerService postControllerService;

    @EzyAutoBind
    private WebTermControllerService termControllerService;

    @EzyAutoBind
    private WebCommonValidator commonValidator;

    @DoGet("/")
    public View home(
        HttpServletRequest request,
        @RequestParam(value = "sortOrder") String sortOrder,
        @RequestParam(value = "nextPageToken") String nextPageToken,
        @RequestParam(value = "prevPageToken") String prevPageToken,
        @RequestParam(value = "lastPage") boolean lastPage,
        @RequestParam(value = "limit", defaultValue = "12") int limit
    ) {
        commonValidator.validatePageSize(limit);
        DefaultPostFilter filter = DefaultPostFilter
            .builder()
            .postType(PostType.BLOG.toString())
            .postStatus(PostStatus.PUBLISHED.toString())
            .build();
        String language = languageControllerService
            .getLanguageCodeOrDefault(request);
        PaginationModel<WebPostItemResponse> pagination = postControllerService
            .getPostItemPagination(
                filter,
                language,
                sortOrder,
                nextPageToken,
                prevPageToken,
                lastPage,
                limit
            );
        List<WebTermResponse> topCategories = termControllerService
            .getActivatedTermsByTypeOrderByDisplayOrderDesc(
                TermType.CATEGORY.toString(),
                5
            );
        List<WebTermResponse> topTags = termControllerService
            .getActivatedTermsByTypeOrderByDisplayOrderDesc(
                TermType.TAG.toString(),
                50
            );
        return View.builder()
            .template("home")
            .addVariable("pagination", pagination)
            .addVariable("topCategories", topCategories)
            .addVariable("topTags", topTags)
            .addVariable(
                "headingFragments",
                pageFragmentManager.getPageFragmentMap(
                    "main_page_heading",
                    language
                )
            )
            .addVariable(
                "webBannerImageUrl",
                trimOrNull(
                    settingService.getTextValue(
                        SETTING_NAME_BANNER_IMAGE_URL
                    )
                )
            )
            .addVariable("pageTitle", "home")
            .build();
    }
}
Ở đây chúng ta bổ sung thêm
termControllerService và 2 biến topCategories, topTags.3. Ghép dữ liệu vào Template
Sau khi có dữ liệu ở Controller, ta sẽ ghép vào template
home.html, như sau:<div class="topics"> <h2 class="h2">[[#{topics}]]</h2> <a th:each="topCategory : " th:href="" class="topic-btn"> <div class="icon-box"> <img th:if="" th:src=""> </div> <p>[[]]</p> </a> </div> <div class="tags"> <h2 class="h2">Tags</h2> <div class="wrapper"> <button th:each="topTag : " type="button" class="hashtag"> #[[]] </button> </div> </div>
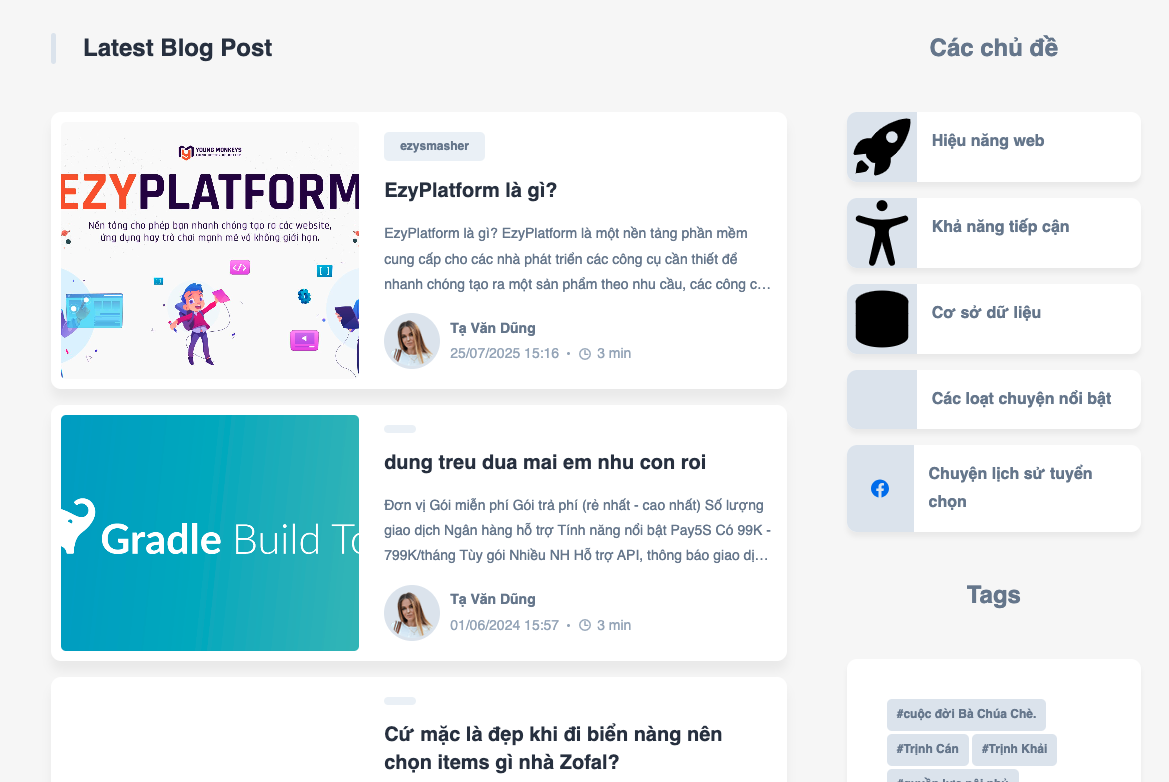
Khởi chạy lại
PersonalThemeStartupTest và refresh lại trình duyệt, kết quả chúng ta nhận được có thể là: