VNPay integration
Back to ezypaymentTo integrate VNPay, you will need to perform the following steps:
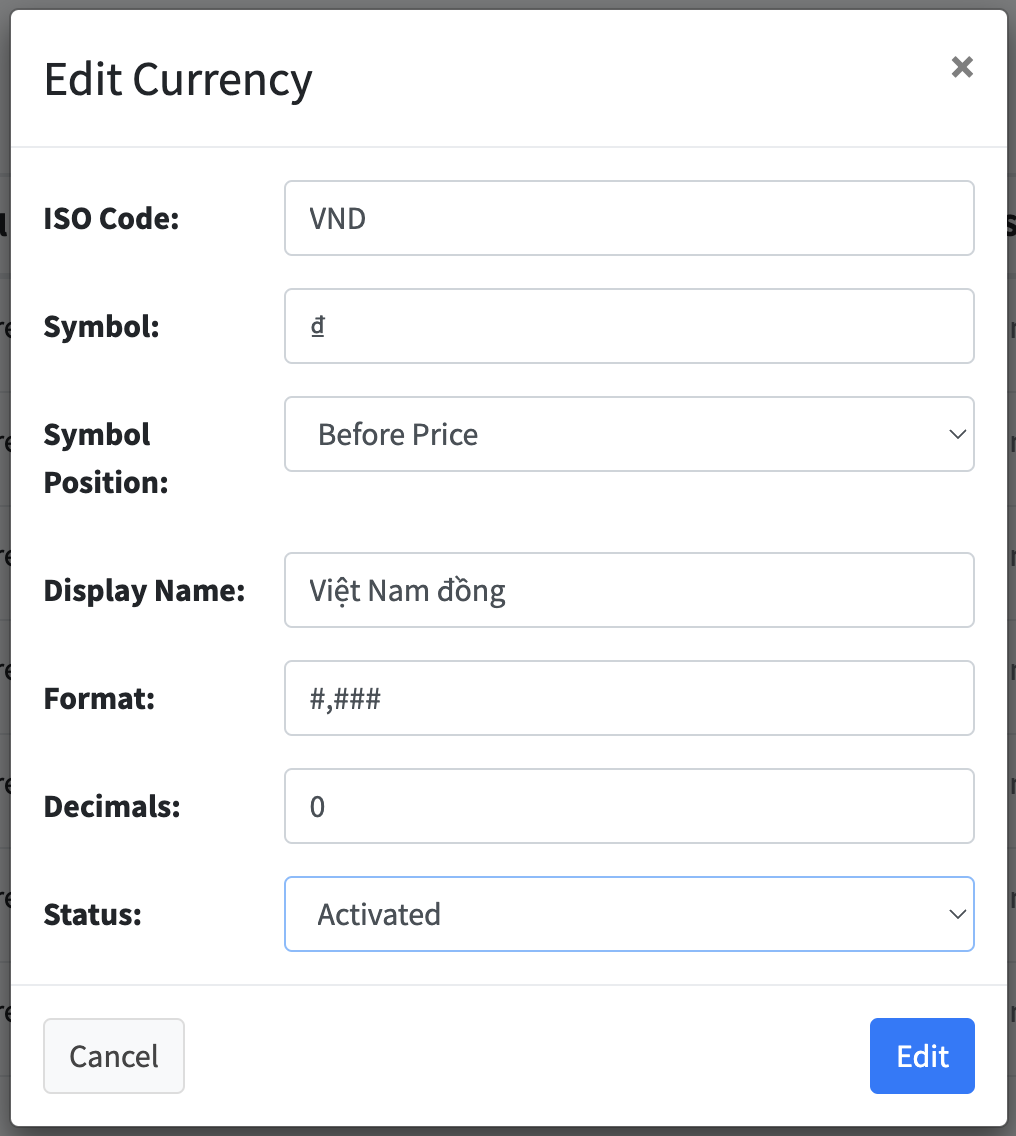
Create the currency type VND by accessing the admin and selecting the 'E-Commerce > Currencies' menu, click on create button, and then fill in the information as follows:
Sandbox Environment
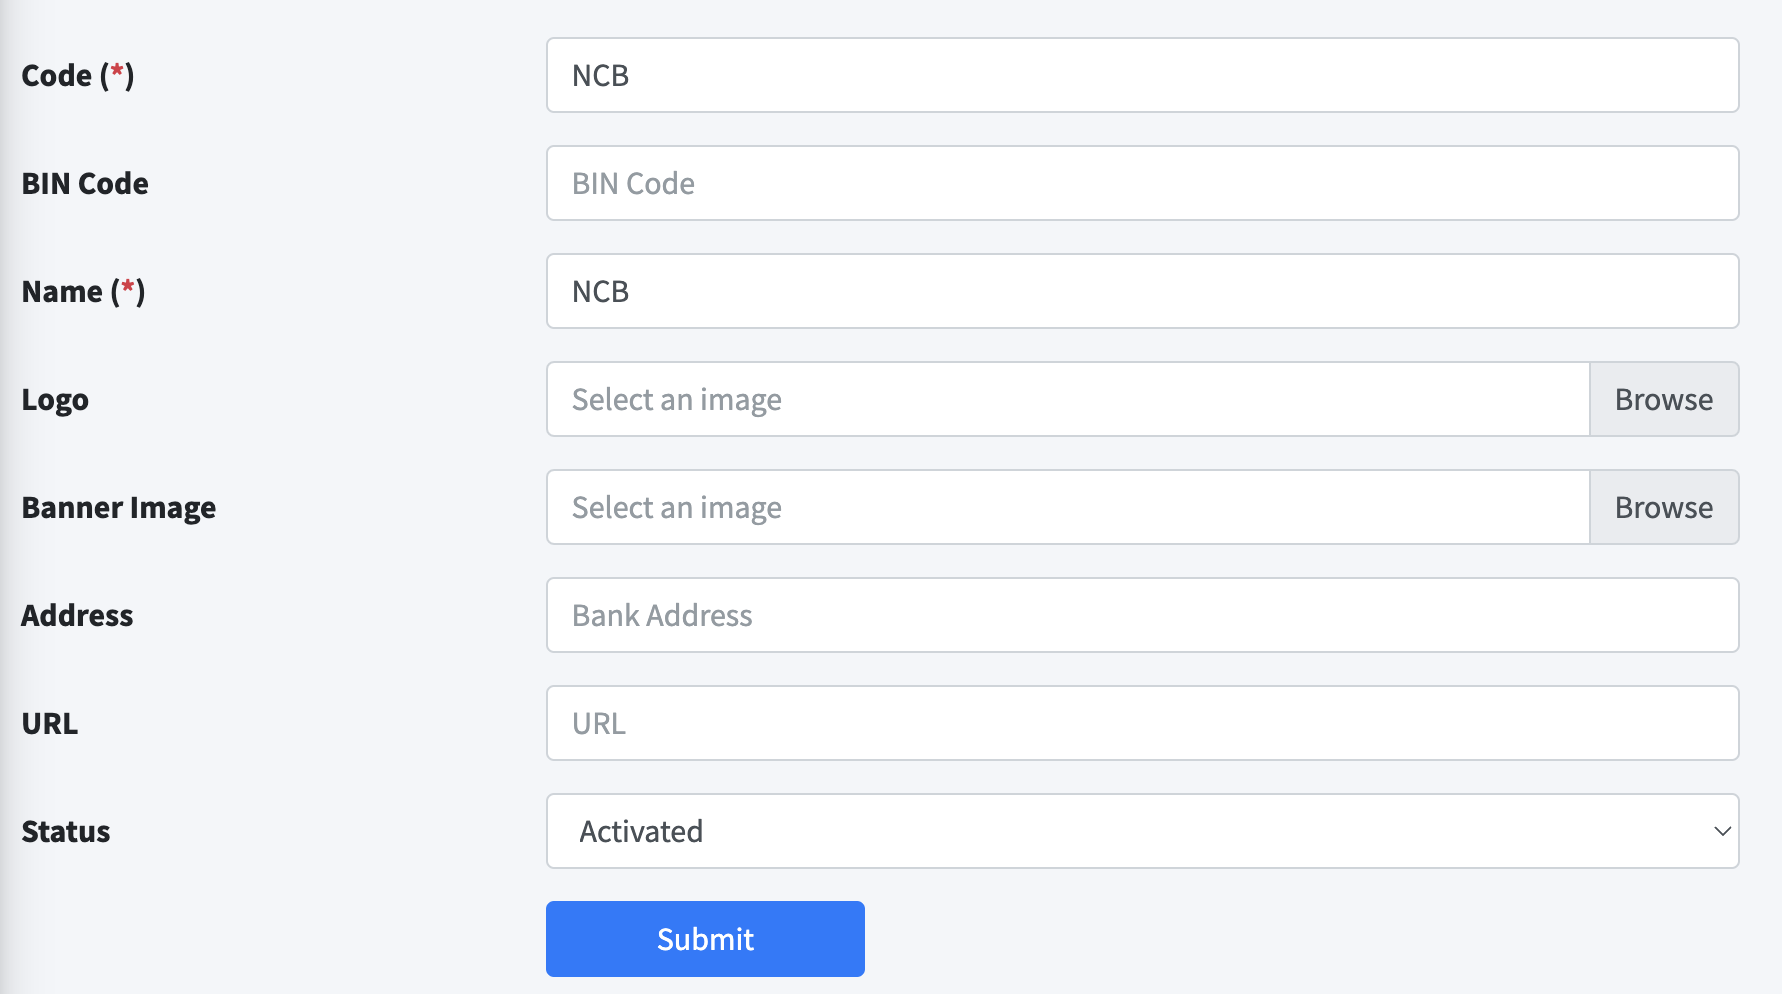
To integrate the sandbox environment, you will need to create a bank named NCB by accessing the admin and navigating to the 'E-Commerce > Banks' menu, click on create button, then fill in the information as follows:
Integrating the sandbox environment is relatively straightforward. Access the admin interface, navigate to the 'E-Commerce > Payment Services' menu. Then select VNPay from the list and fill in the information as follows:
- Name: VNPay.
- Version: 2.1.0.
- Bank: Select NCB.
- Currency: Select VND.
- Service URL: Fill in: https://sandbox.vnpayment.vn/paymentv2/vpcpay.html
- Service API URL: Fill in https://sandbox.vnpayment.vn/merchant_webapi
- Callback URL: Leave it default.
- Client key: You can use:
DEMOV210. - Secret key: You can generate a random string.
- Status: Choose
Activated.
Save your changes, then try checking out an order to see the VNPay payment option. Select VNPay for payment and use the following account to pay:
Bank: NCB
Card number: 9704198526191432198
Cardholder name: NGUYEN VAN A
Issue date: 07/15
OTP password: 123456
Or you can choose any account here.
Production Environment
Integrating the production environment is relatively complex. You will need to sign a contract with VNPay and integrate it with the technical team through a series of steps.
Steps to sign the contract
- Firstly, you must be a legal entity.
- Leave your contact information here. Then wait for VNPay staff to contact you via email.
- VNPay staff will send you an email with the 'Service Usage Registration Form' and 'Service Usage Contract'. You will need to fill out both forms, sign, stamp, and send them back. Note that VNPay requires a lot of documents to verify your business, from photos, office videos, business registration licenses, domain ownership proofs... You should compile all the files into one place, for example, a Google Drive folder, and share it with them. Additionally, your website must default to displaying VND currency and must show complete business information such as address, tax ID at the footer of the website to be accepted.
- After signing the contract, VNPay staff will send you an email about sandbox environment information and initiate a Skype chat group. Join this group to start the technical integration process.
Technical integration steps
- You will need to deploy ezyplatform on a server with a domain and HTTPS connection, let's assume it's
example.com. - After receiving sandbox environment information via email, go to the 'E-Commerce > Payment Services' menu of
example.com. Then select VNPay from the list and fill in the information as follows: - Name: VNPay.
- Version: 2.1.0.
- Bank: Select NCB.
- Currency: Select VND.
- Service URL: Fill in: https://sandbox.vnpayment.vn/paymentv2/vpcpay.html
- Service API URL: Fill in https://sandbox.vnpayment.vn/merchant_webapi/
- Callback URL: Leave it default.
- Client key: Use the
vnp_TmnCodeidentifier you received in the sandbox environment email. - Secret key: Use the
secretKeysecurity code you received in the sandbox environment email. - Status: Choose
Activated.
Save your changes.
- Now, log in to https://sandbox.vnpayment.vn/vnpaygw-sit-testing/order/instruction. Use the login name and password you received in the sandbox environment email.
- Or access the IPN URL configuration section https://sandbox.vnpayment.vn/vnpaygw-sit-testing/ipn. Assuming your domain is example.com, enter the value of IPN as:
https://example.com/payment/verify/VNPAYand save it. - Testing phase, this step is quite complicated, so focus carefully, read this guide thoroughly before starting, and remember it well.
- You need to create 2 new transactions up to the OTP step. This is to create test cases.
- Test until all tests are successful.
- Remember the order ID and the time you clicked the test button so that you can view the logs in nginx during acceptance testing and fill in the test record.
- After testing, inform VNPay's technical team in the Skype group.
- VNPay's technical team will check, if there are no issues, they will send you IPs and ask you to add them to the whitelist. The IPs could be:
Sandbox environment:
113.160.92.202.
Production environment:
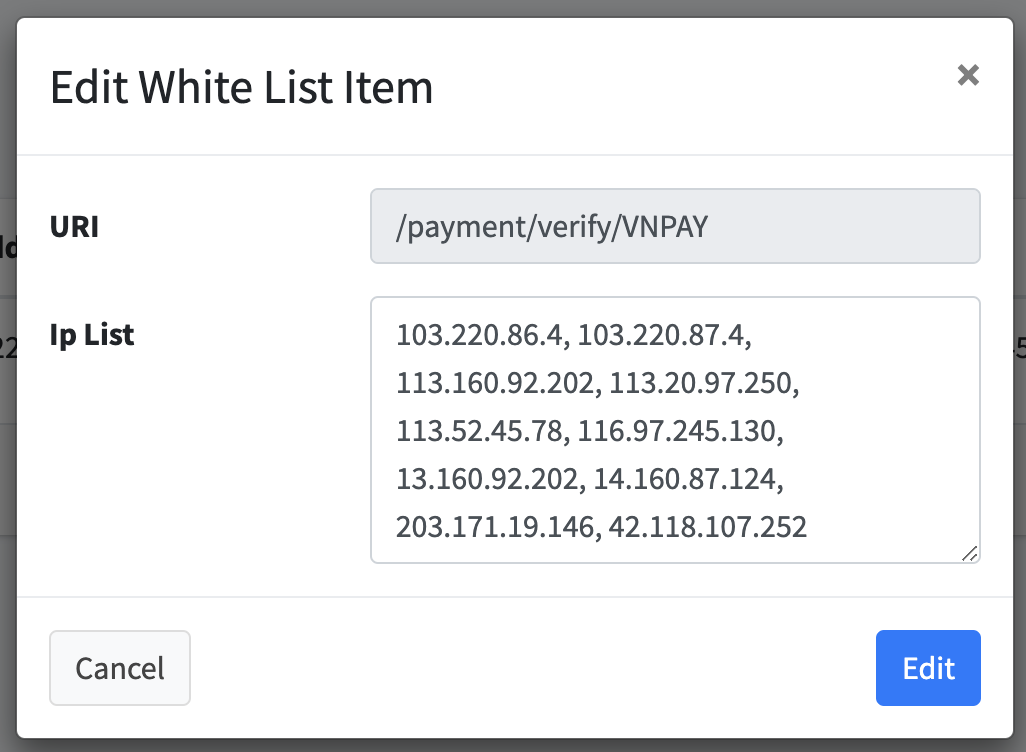
113.52.45.78
116.97.245.130
42.118.107.252
113.20.97.250
203.171.19.146
103.220.87.4
103.220.86.4
- You will need to install EzyDefence, activate it, restart, and then go to the 'EzyDefence > Whitelist' menu and add a record containing all the IPs above like this:
- Go back to the Skype group and notify VNPay's technical team to confirm that IPs outside the whitelist cannot call the API.
- If there are no issues, they will send you a test record, fill in the necessary information, sign, stamp, and send it back.
- After receiving the test record, they will send you another email containing information about the production environment.
- You will need to create a bank named VNPAY
QR by accessing the admin and navigating to the 'E-Commerce > Banks' menu, click on create button, then fill in the information as follows:
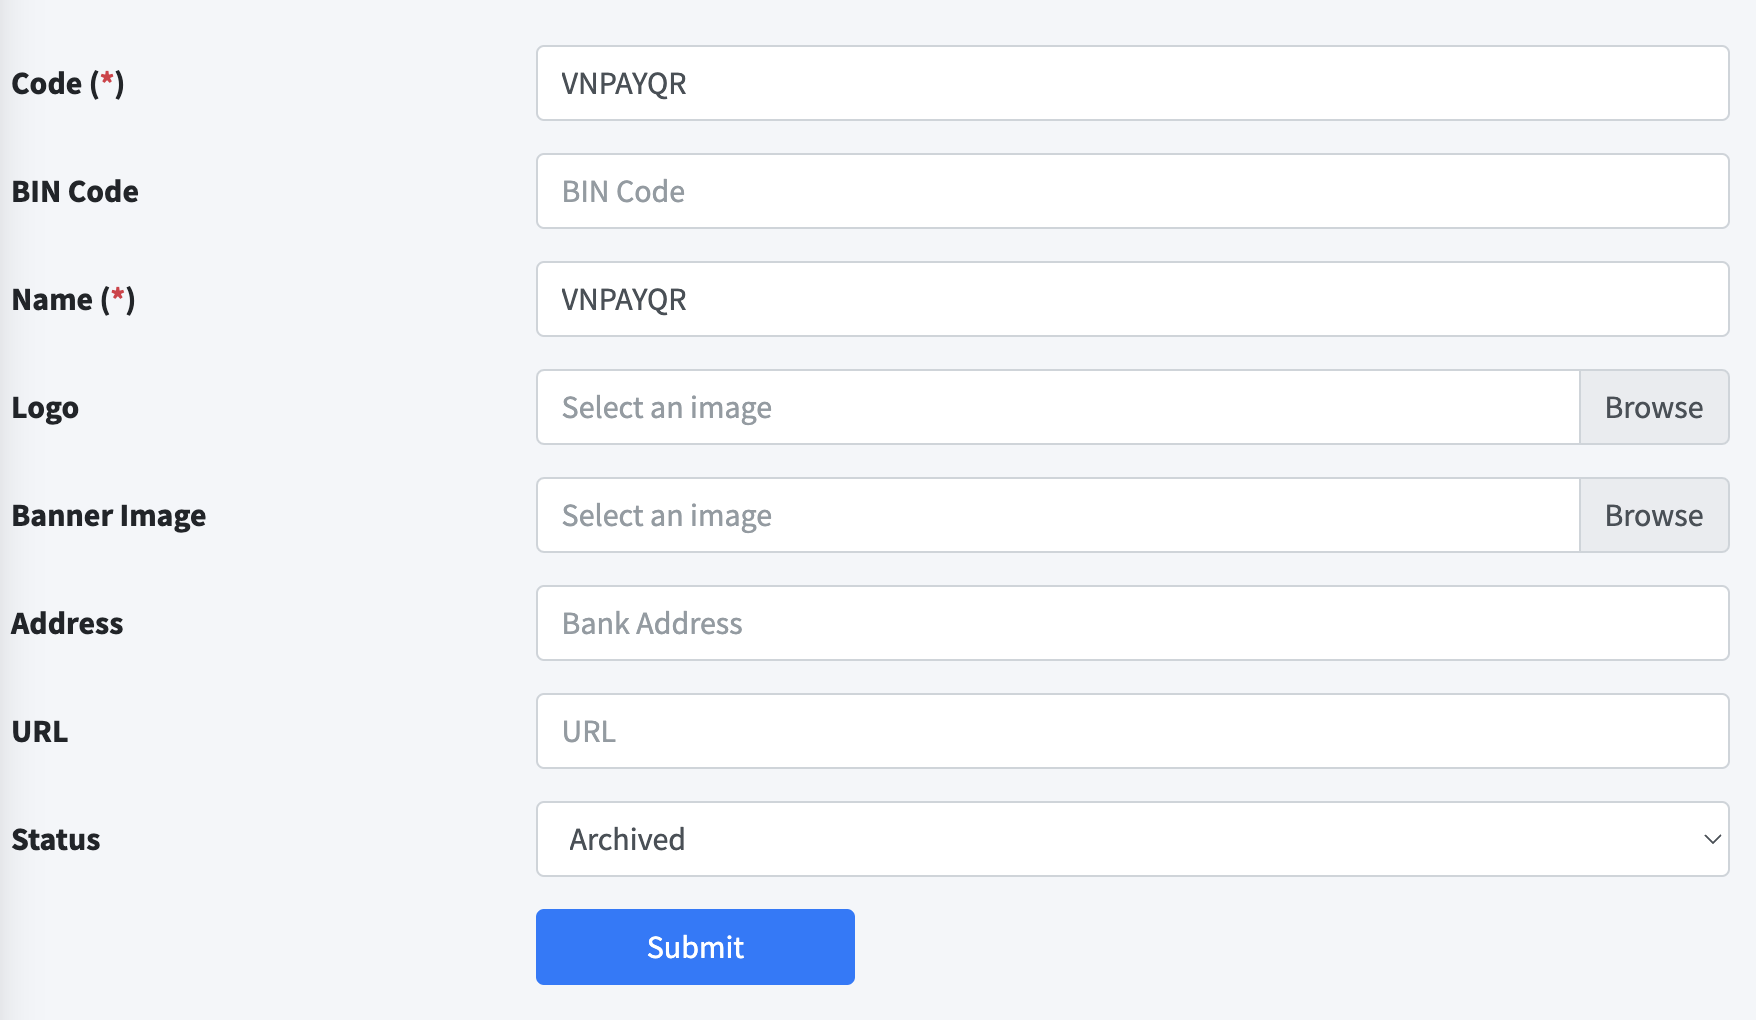
Note to set the status to
Archived to avoid displaying the bank on the end-user website interface.- Update the information of the VNPay settings by going back to the 'E-Commerce > Payment Services' menu of
example.com. Then select VNPay from the list and fill in the information as follows: - Name: VNPay.
- Version: 2.1.0.
- Bank: Select VNPAYQR.
- Currency: Select VND.
- Service URL: Fill in: https://pay.vnpay.vn/vpcpay.html
- Service API URL: Fill in https://pay.vnpay.vn/merchant_webapi
- Callback URL: Leave it default.
- Client key: Use the
vnp_TmnCodeidentifier you received in the production environment email. - Secret key: Use the
secretKeysecurity code you received in the production environment email. - Status: Choose
Activated. - Test again by creating a real transaction with a small amount.
Congratulations! You have successfully integrated VNPay!